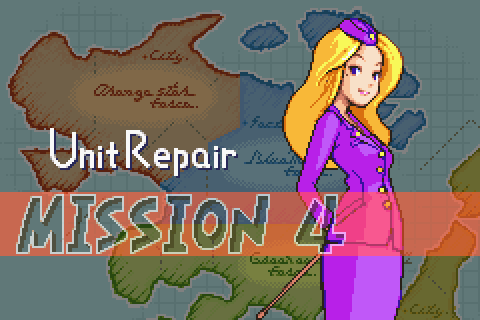
Part 5: Field Training Missions 4 to 6
Field Training Missions 4 to 6 (or "I've got a 10-year-old ghost to exorcise")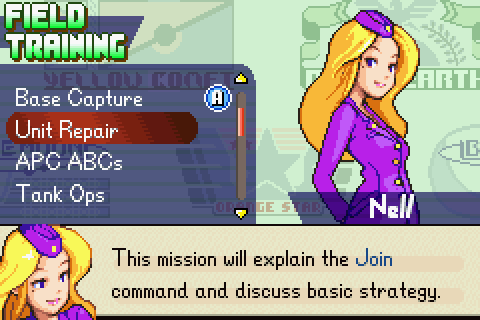
My favourite Field Training mission today (although it isn't this one).
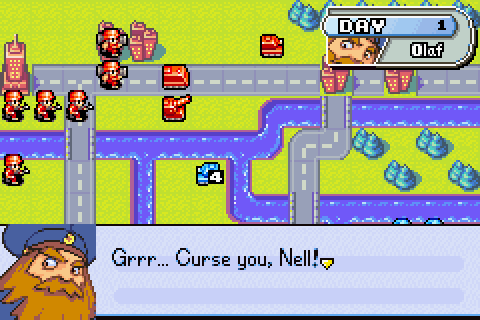
 But all of our commanders are caught up in other campaigns. So there's no one available to lead the Orange Star Army against him.

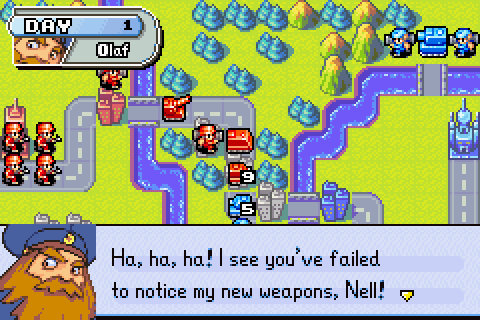
 Let me brief you on the current mission. Our troops en route to the Lost Fortress have been waylaid by Olaf.It's up to you to join up with them, beat back Olaf and secure the area. We need the Lost Fortress! Move out!
How lost can it be if we know where it is? Oh well, whatever.
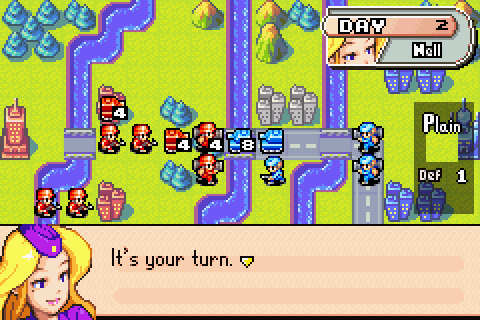
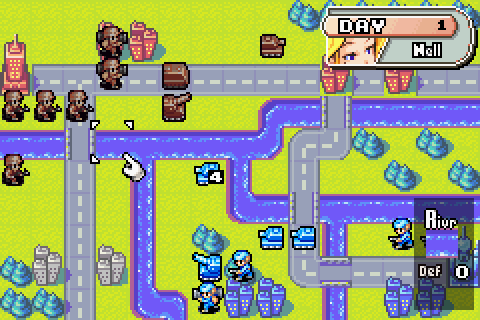
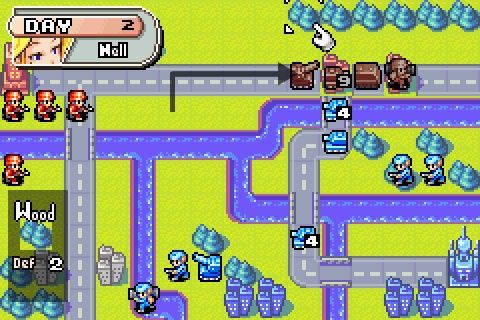
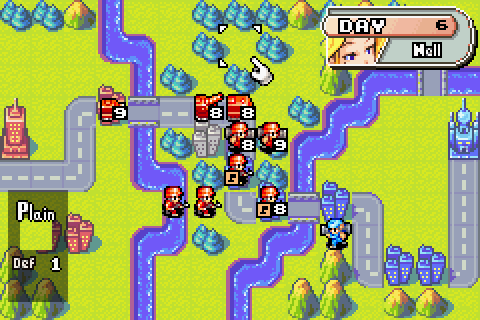
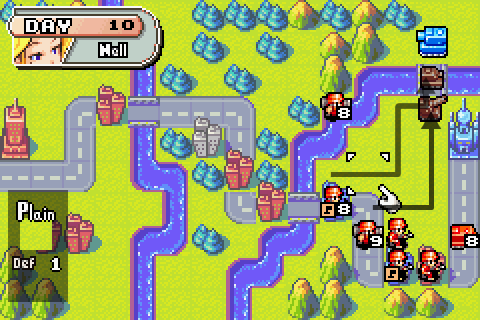
Day 1
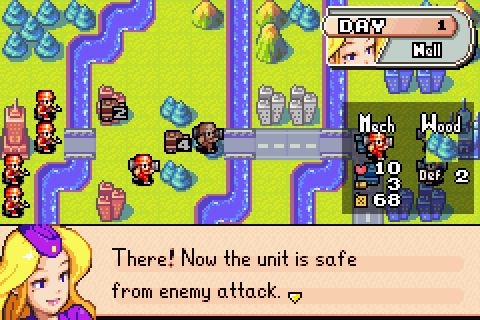
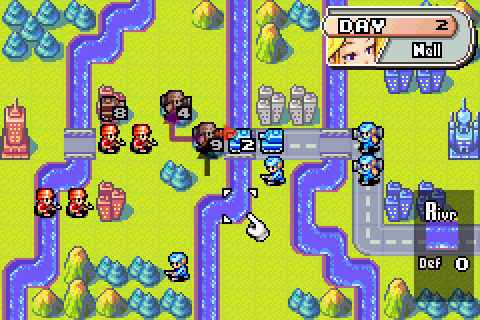
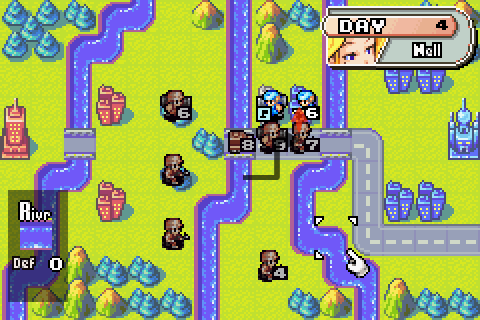
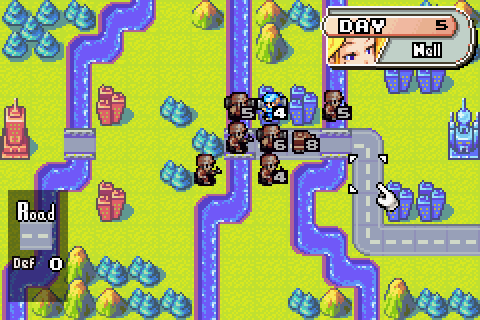
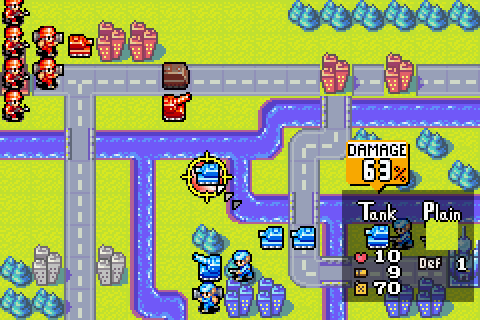
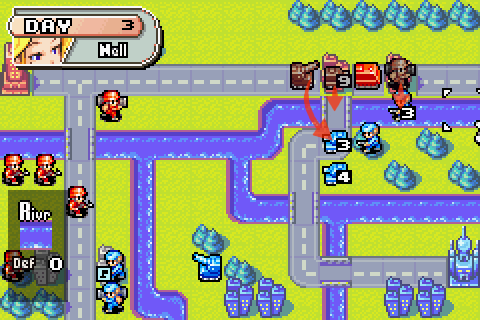
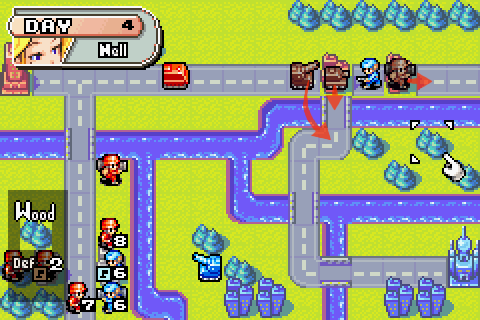
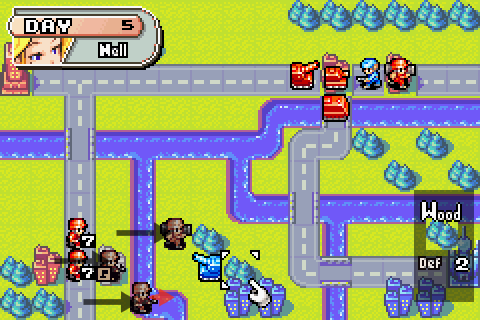
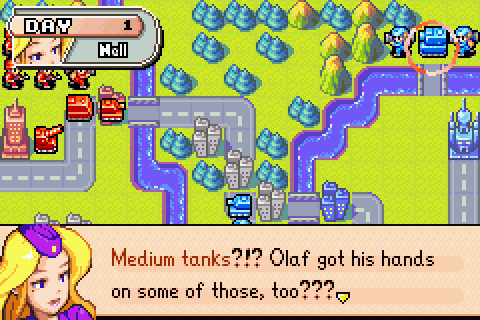
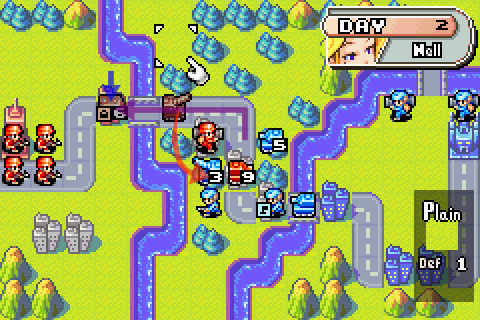
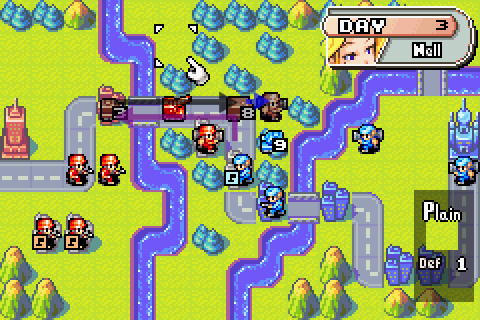
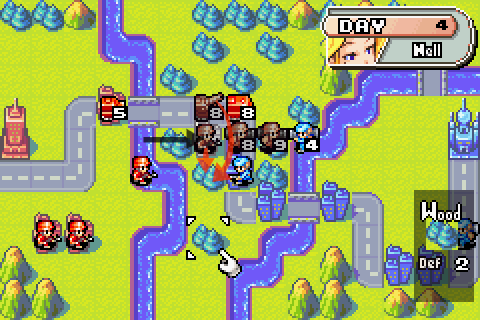
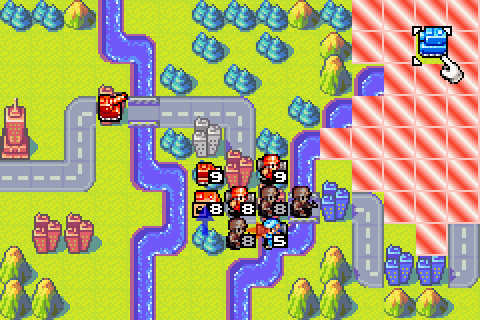
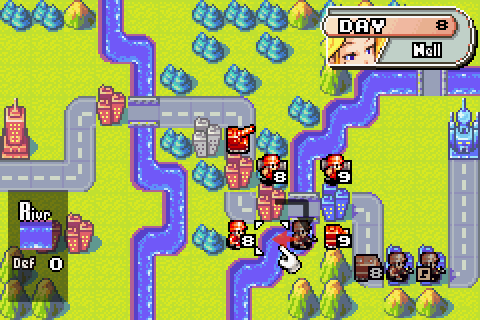
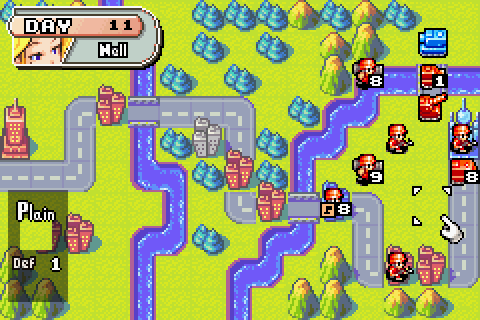
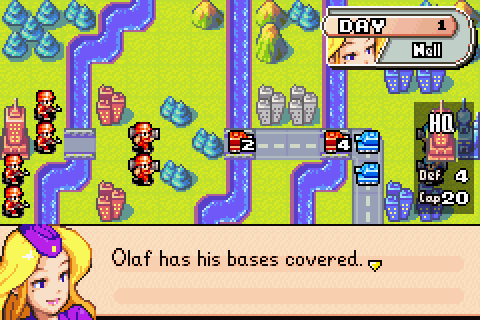 It looks like he understands the importance of holding this area. Almost all of our units heading for Lost Fortress have been eliminated. There are only two tank units left of the original contingent. We must repair them in order to have any hopes of winning here. So first, let's pull those two units back here and patch them up.
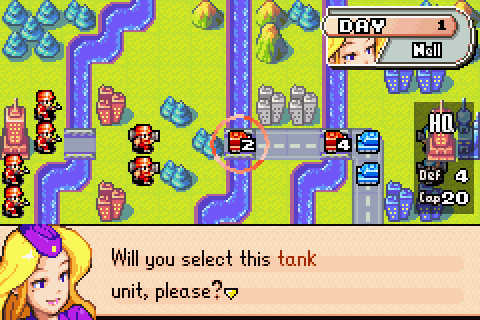 To repair a unit, just move it to an allied city or a secure base. This tank unit can make it to this city. Please move it here.
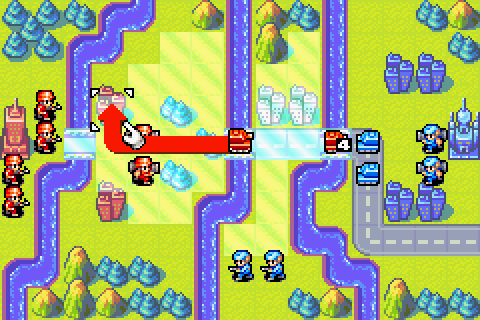
Sounds like a plan.
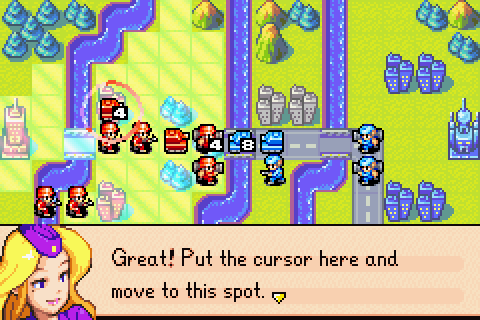
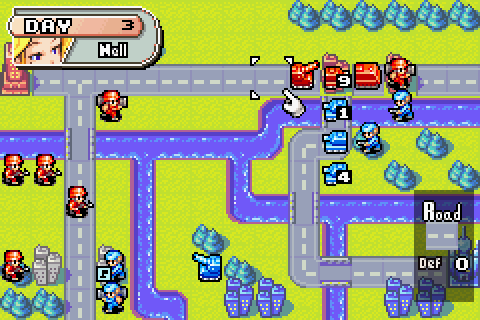
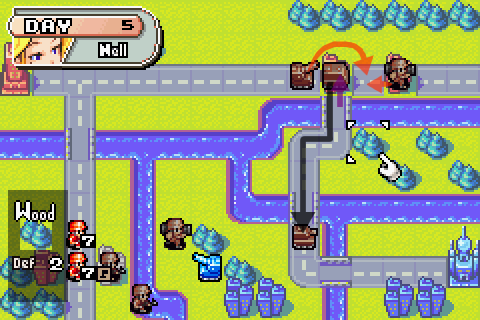
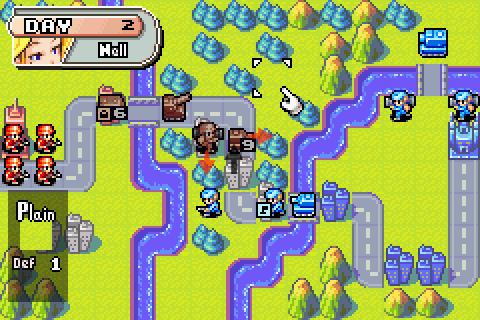
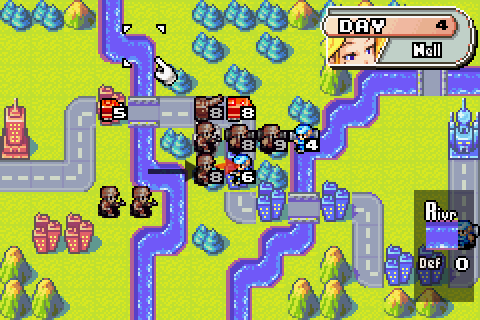
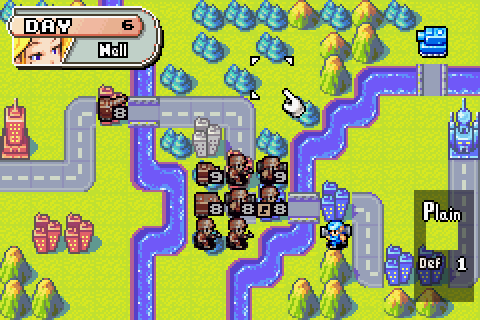
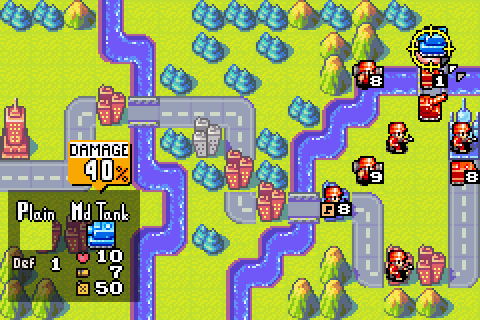
 This tank unit will now recover two HP for every turn it stays here. Okay. Now, let's withdraw this tank unit, too. Would you select it, please?
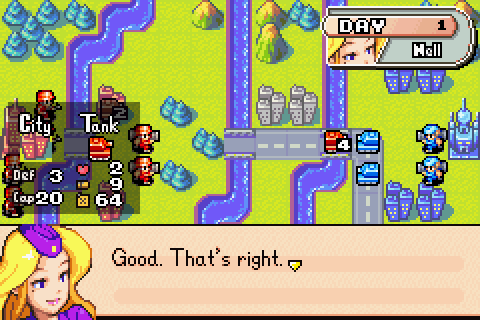
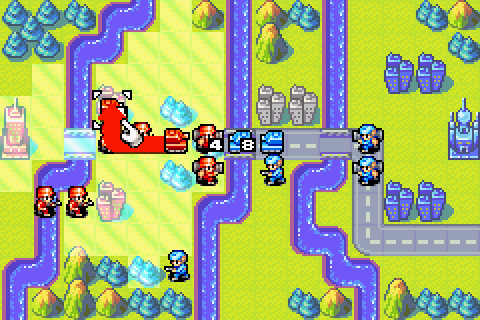
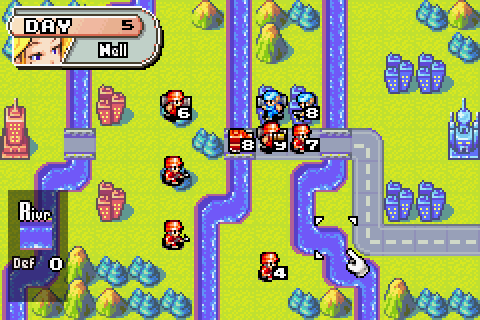
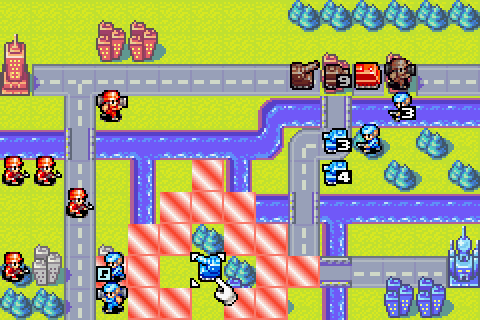
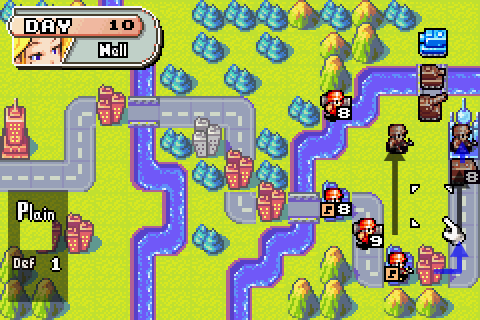
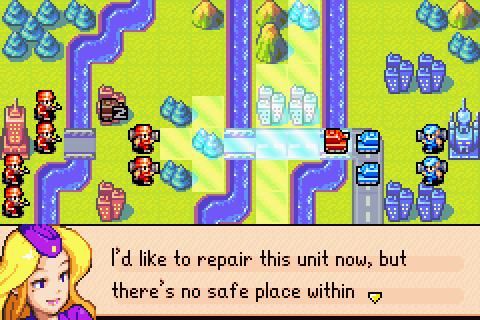 its movement range. There's nothing we can do about that. Let's get it as close to a city as possible and begin repairs next turn. Would you move it here, please?
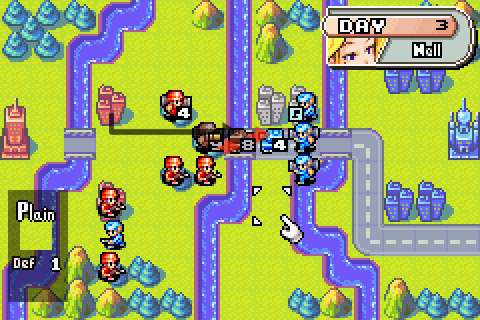
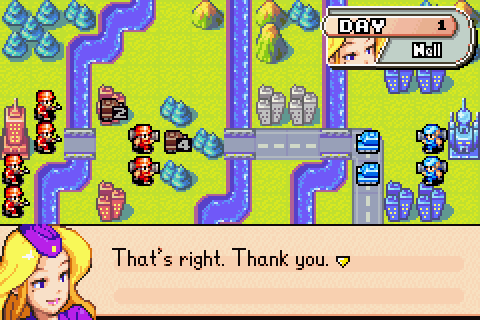 But we can't stop there, can we? The unit's still vulnerable to attack from the enemy's tank unit. Place the cursor on a unit and press the B Button to check its attack range. The area it can Fire upon will appear in red. Well, what to do now? How about giving it a little assistance? Let's deploy other units around it to prevent it from being attacked. This tactic is called building a defensive wall.
 Most Advance Wars players call it "meatshielding". But hey, tomayto, tomahto.
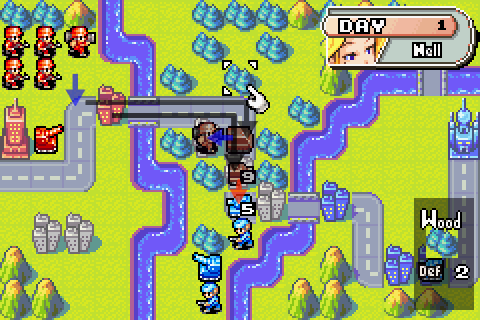
Our available units are...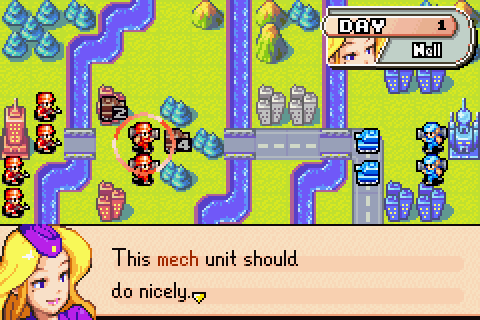 Move it here to create a defensive wall.
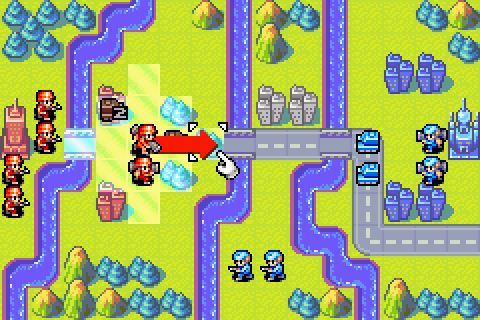
Sorry lad, you've drawn the short straw.
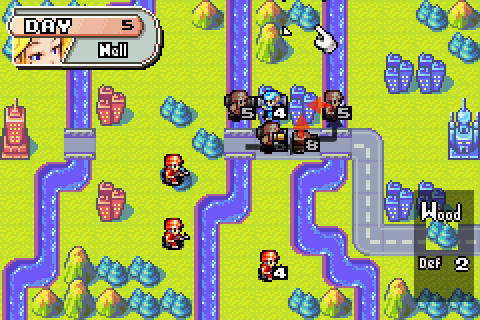
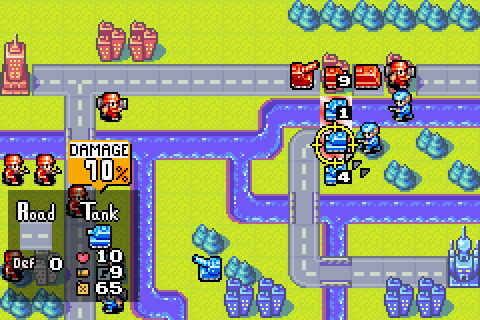
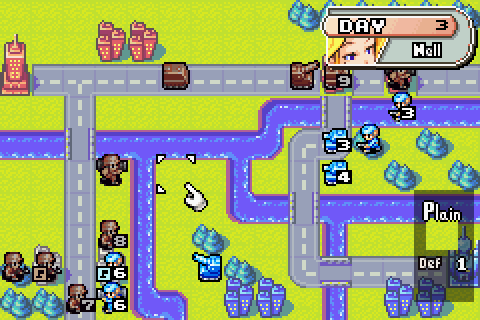
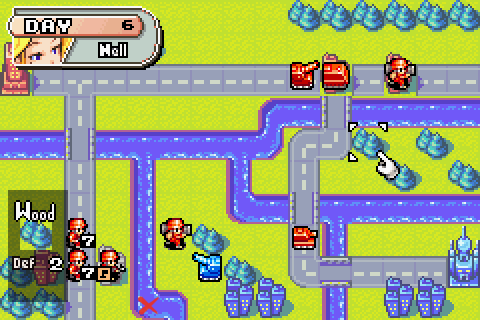
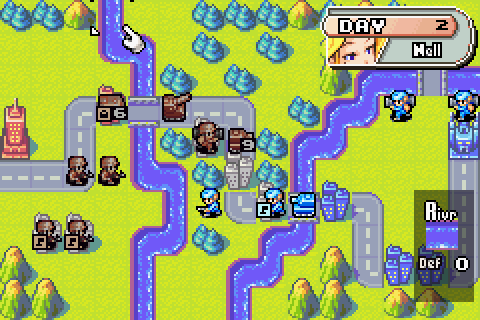
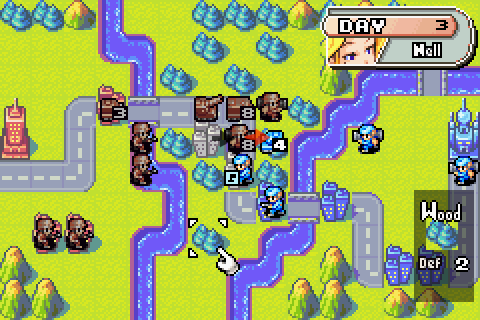
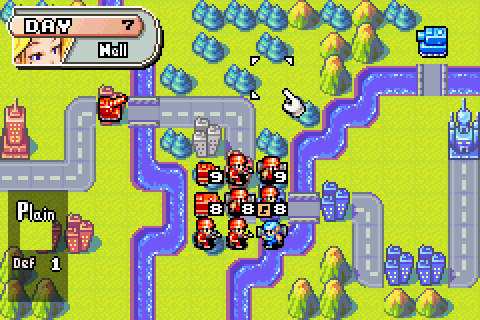
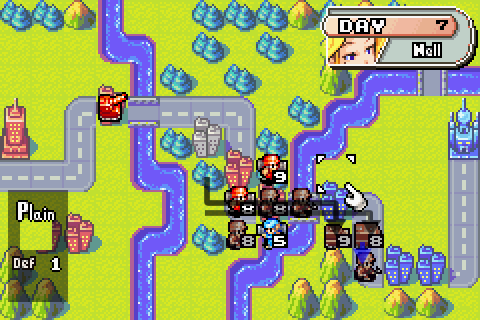
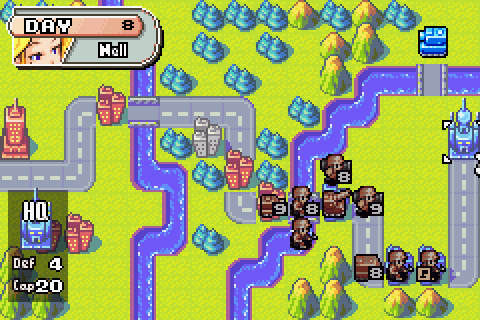
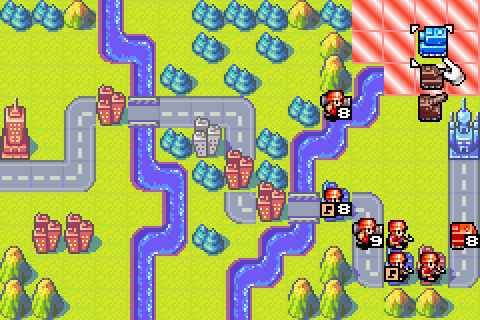
 Enemy units can't cross allied lines and vice-versa. You can see why a defensive wall is such an effective strategic tool. This mech unit will come under fire, but it should be able to hold a turn. Since we have two mech units, we should be OK for two days. So, move the mech units up, and then deploy the infantry as you like. Press End when you're finished.
This looks pretty good to me. Let's end turn.
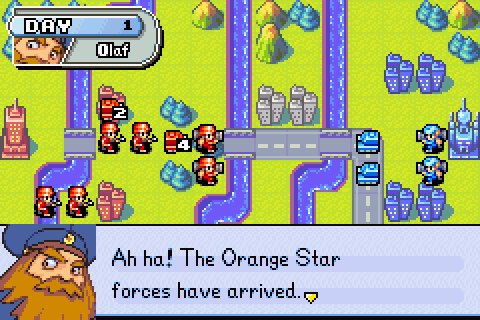
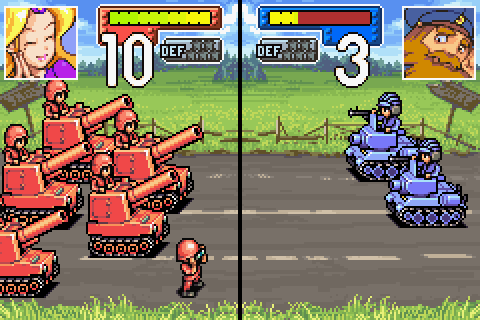
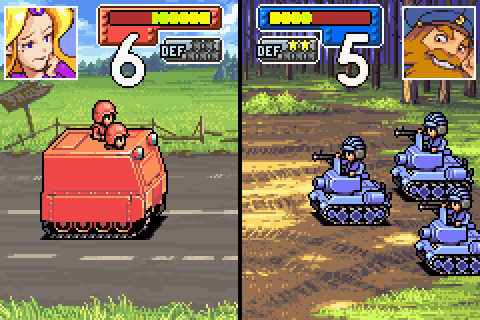
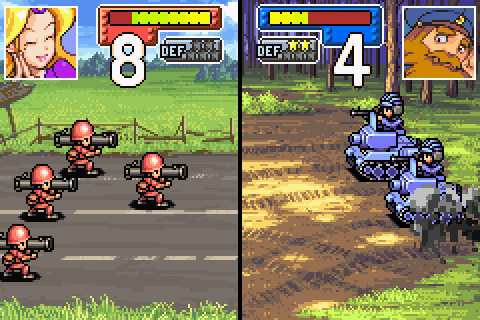
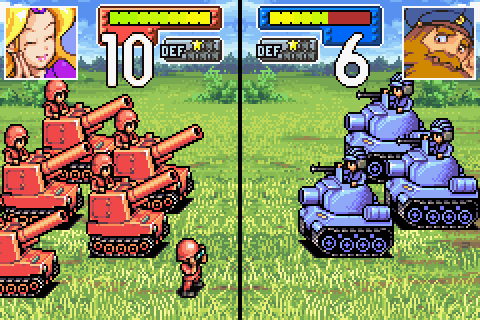
 It looks like the group that's been giving me such trouble, too. But... they don't even have one decent tank unit with them! I've nothing to fear from these ragged fools. Prepare to be routed!
Uh, yeah, no.
Mind you, fair play, that attack packed a punch. Glad I avoided those tanks in the previous Field Training mission.
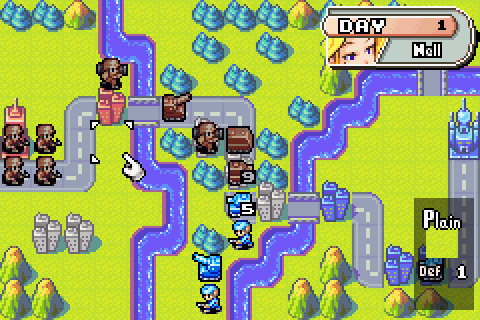
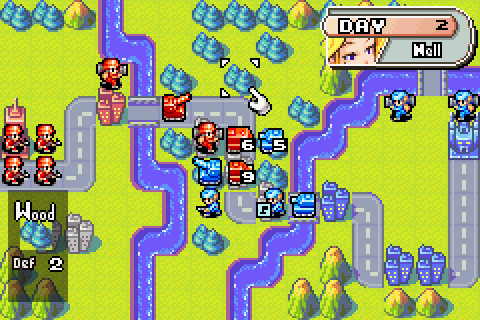
Day 2
"It's your turn." Count: 3.
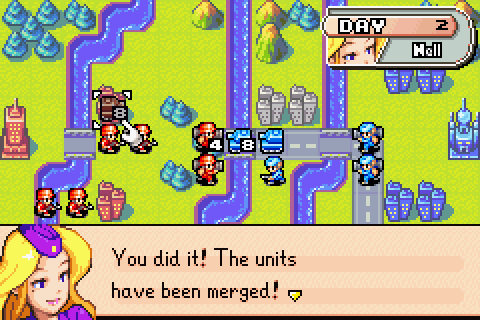
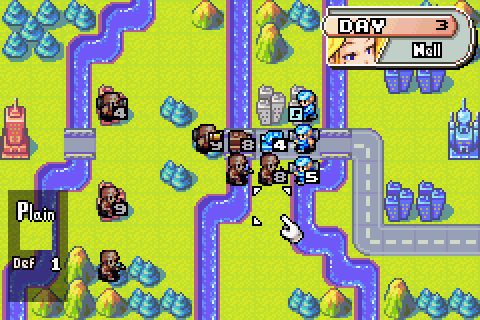
The enemy is closing in, but... the tanks need more time for repairs. Even regaining two HP per day, we're not going to be ready in time. It looks like we'll have to Join these two units together. 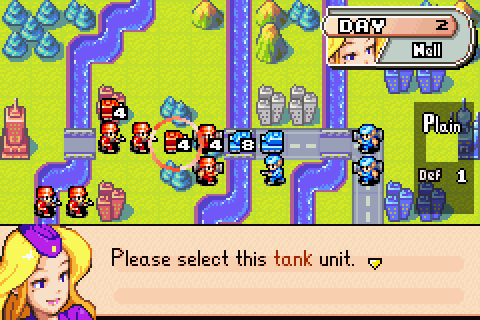
Putting two units on the same square? This is madness!
No. This is science.
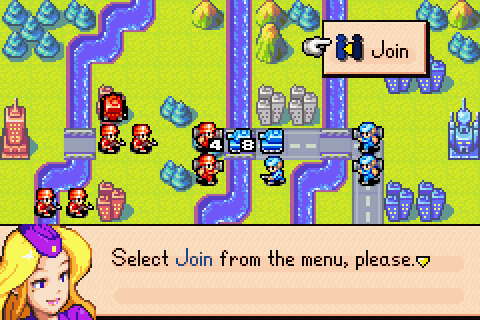
My creation lives!
... but seriously, I already showed this one off a couple of Field Training missions before Nell demonstrates it here. Still, useful advice.
When two units Join, they combine their HP. Of course, now there's only one unit, but... I know that two units may seem better than one at most times, but running around with low HP is very risky. I recommend using Join when you feel it's necessary. I'm going to leave the rest of this mission to you.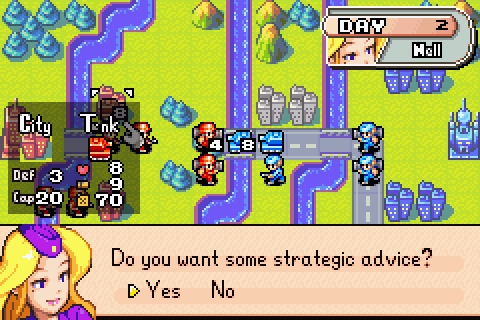
Sure, why not.
The tank unit will have full HP and be ready to go on the next turn. First, use your mech and tank units to destroy the enemy tanks. If your mech units take too much damage, use Join to merge them. If you can just get rid of Olaf's tank units, you'll surely win. As long as you keep your HQ from being seized, you can't lose. You can also win by Capturing the enemy's HQ, but it'll be faster to defeat all of the enemy units. Good luck!
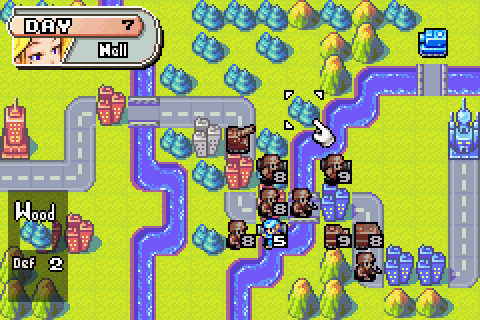
All right, then. First of all, that mech unit is looking worse for wear.
Let's retreat it and bring up the other mech to take its place, doing some nice damage to one of Olaf's tanks in the process.

Infantry move up to prevent my mech being flanked by Olaf's infantry.
And the other guys spread out and get into cover.
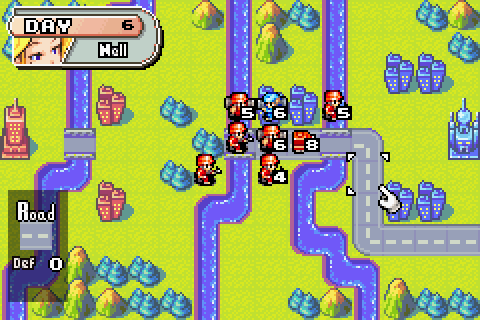
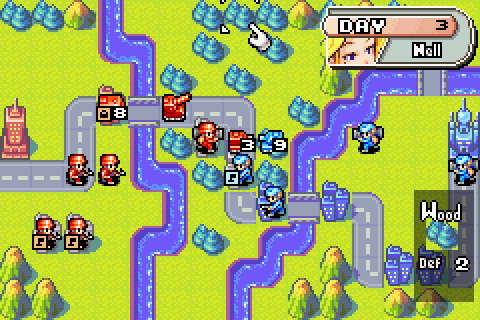
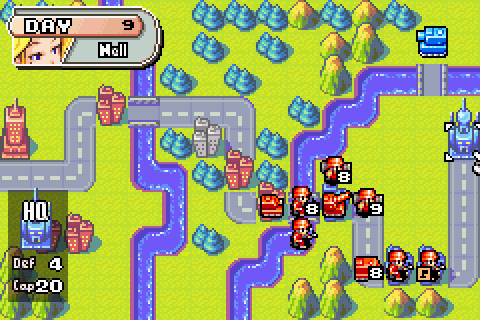
Day 3
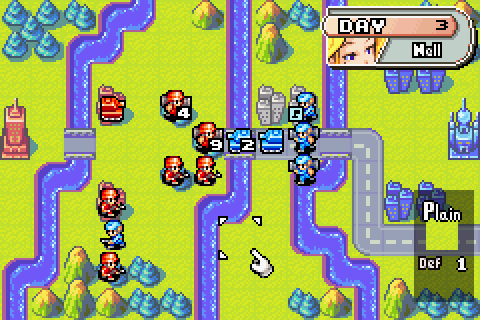
Well, we all just learned a valuable lesson about retreating damaged units from the frontlines and cycling in fresh ones, but it seems like someone wasn't paying attention.
What are we gonna do with you, Olaf?
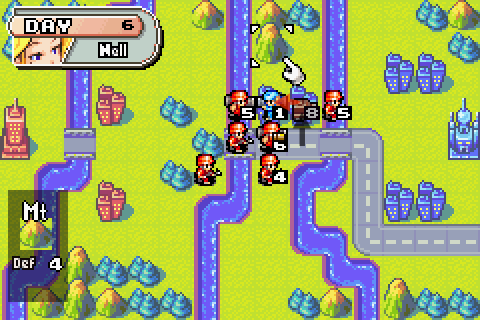
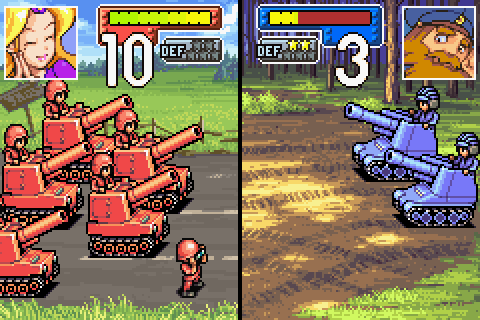
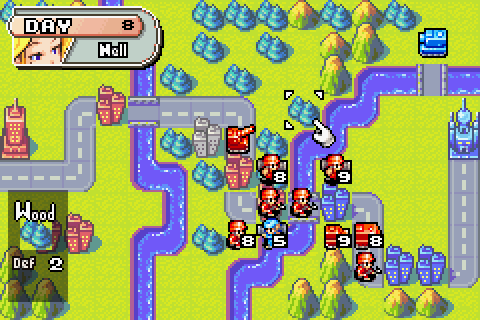
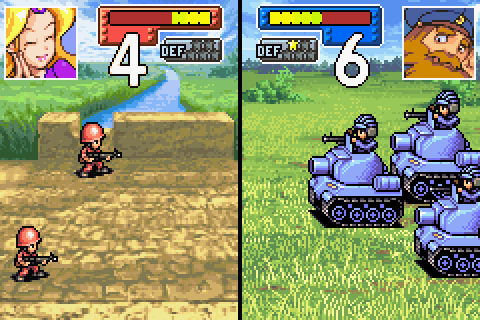
After my mech takes out the 2HP tank, my own fully healed tank bursts through and engages Olaf's second tank.

Again, gotta be alert to prevent that mech from flanking me at the bridge. One of my infantry units moves up and gives it what for. Meanwhile my two southern infantry take out Olaf's attempt to sneak around the back to my HQ.
4HP mech heads back to get some health, and my other infantry unit moves up to the front lines.
Olaf attacks me, but he looks pretty petrified as his 4HP tank takes on my infantry. Not sure why really, it wasn't that bad of a move.
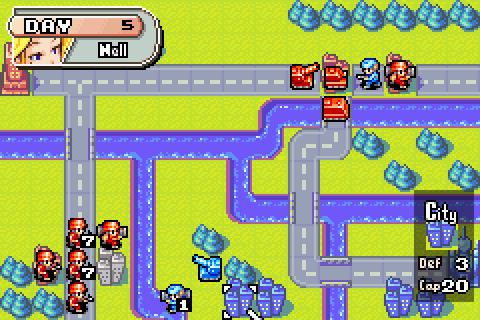
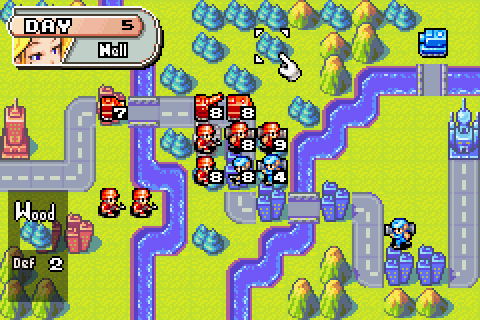
Day 4

Apparently capturing cities is more important to the AI than trying to land a few hits on the enemy. Which, okay, that'd make sense on a map with bases where your economy actually matters. No bases here though.
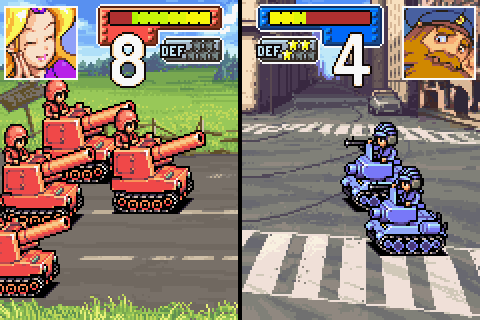
Tank and mech work through Olaf's damaged units.
Slightly risky shot as I take on one of Olaf's city infantry: he's certainly got the defensive edge. But time and tide wait for no man, and we need to get a move on.
An arrow-o-vision view of that as my other infantry move up.
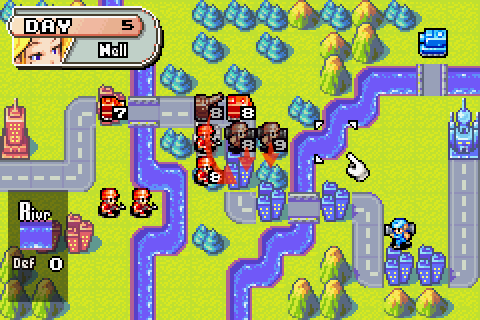
Day 5
Olaf again elects not to attack.

Mechs take on mech. Again, it's something of a war of attrition as I try to clear out Olaf's cities. But at least I have unit count on my side.
Tank and infantry have more joy taking out Olaf's infantry, though.
Closing in for the kill.
Day 6
Olaf just sits there doing repairs.
Tank knocks the mech down to 1HP.
And I finish the job from the river.
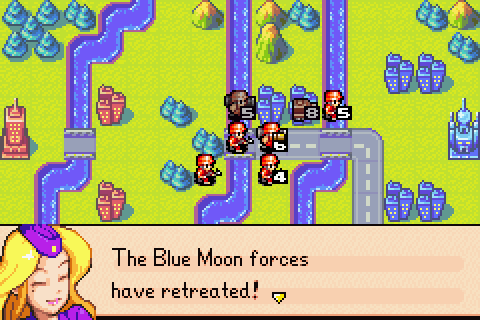
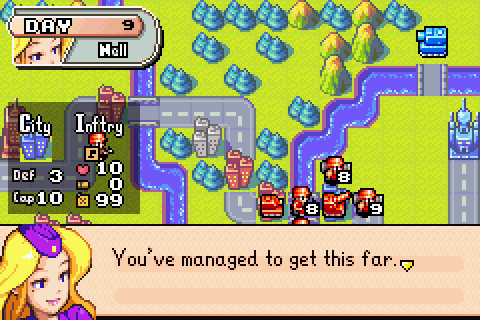
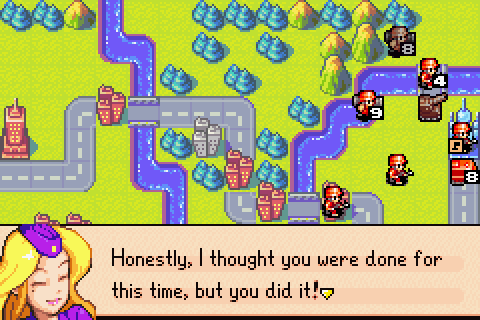
 Capturing this area was vital to our strategy. You did a great job! Keep up the good work. Nell? So, she does have her hand in this! That explains why this little group has been such unexpected trouble. This is unforgivable! Next time, I will give them a display of true might! Mark my words!
Keep dreaming, Olaf.
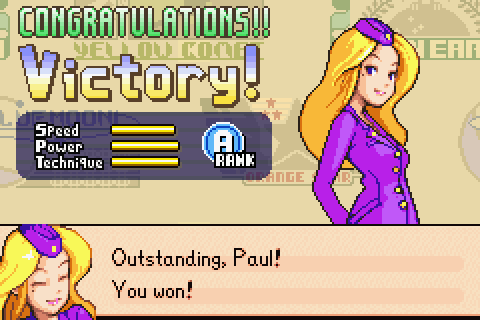
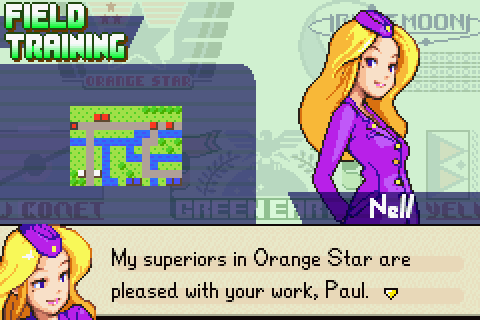
Once again, lagging behind a bit on speed. Oh well, let's see what the next mission has to offer:
A bunch of new commands, apparently.
Glad to see my work here's getting recognised.
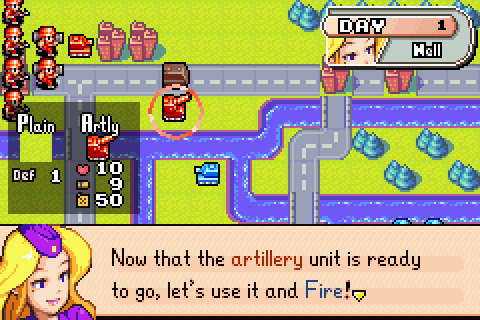
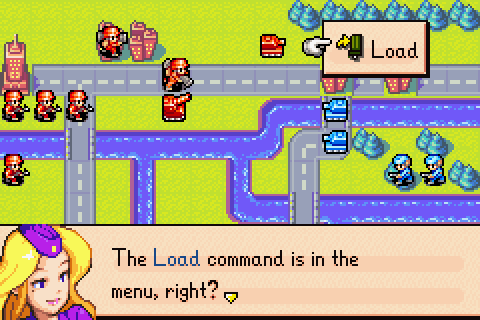
I'm also happy to say that the enemy troops aren't deployed ahead of us. Look at this! An artillery unit has been assigned to your command! Used correctly, this unit'll strengthen your battalion. No doubt about it. But, it sounds like it's seen a lot of action on the front lines, and... Well, I guess we'll get a look at it when we reach the battle-field. Oh, and I've received one more bit of information. You've also been given an APC unit to use. This one is fresh from the factory, so don't worry about its condition. OK, let's get moving!Okay, you know what? I apologise. Olaf doesn't always get everything before us. He tends to get brute force stuff first, and we tend to get clever stuff first. Sensible way to handle it, really.
Day 1
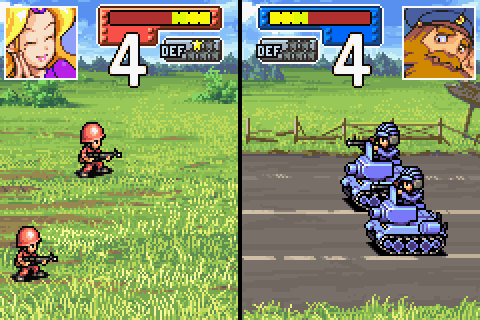
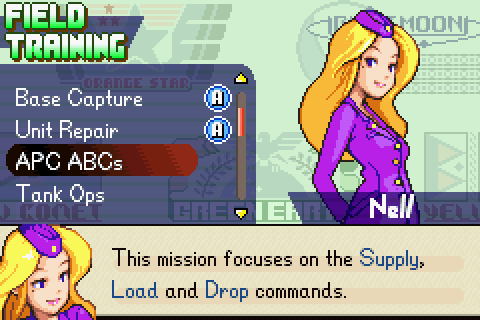
Well, it's good to see that we have an artillery unit, but...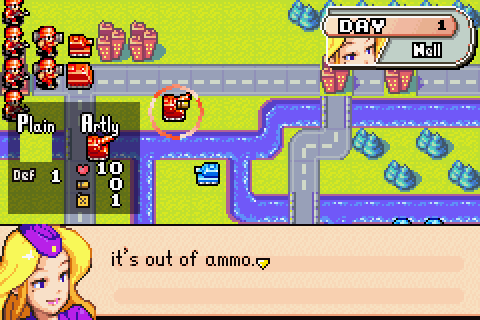 And it's almost out of fuel, too. It can't Fire without ammo, and it can't move without fuel. In this condition, it's useless. But don't worry, I think we'll manage just fine. We just need to supply the unit using a transport unit. When you Supply a unit, you fill its ammo and fuel to the maximum level. For intel on a specific unit, select the unit and press the R Button.
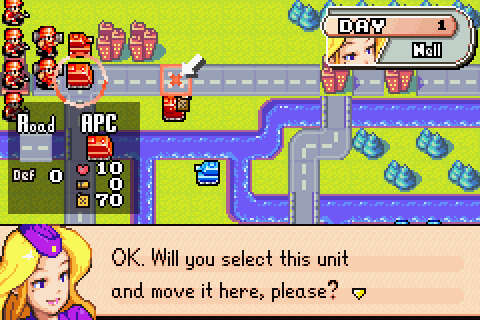
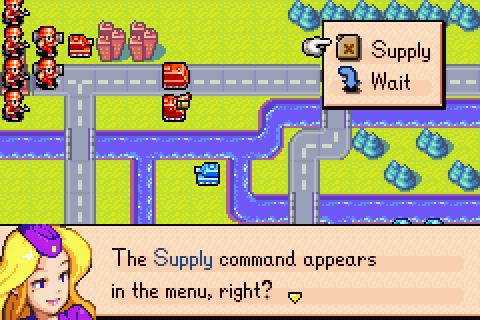 Select that command, please.
Supply, like G did!
Great! Now we've given the unit both ammo and fuel. This is how transport units supply allied units in adjacent spaces. This time, we gave supplies to only one unit, but transport units can also provide supplies simultaneously to any unit adjacent to it. Oh, yes. You can also Supply units by placing them in allied bases. And, as I explained before, in addition to supplies, bases also provide HP. So, use bases when you can. But when you can't, use transport units.Nell's telling a lie here. APCs can resupply other units, but the other transports, T-Copters and Landers, cannot. On the other hand, they have their own strengths that APCs don't, as we'll see in a few updates' time.
 Would you select it, please?
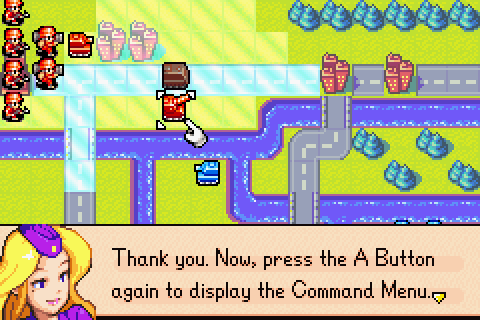
But... but I'm not standing next to anything...
WITCHCRAFT! (Well, okay, no. But that's what it felt like back in 2002
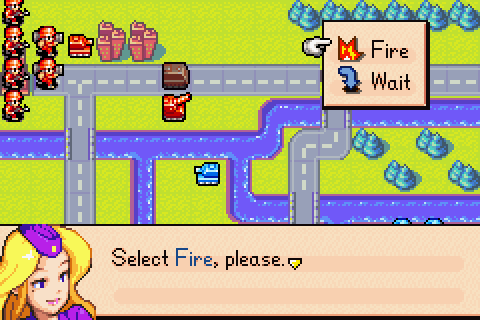
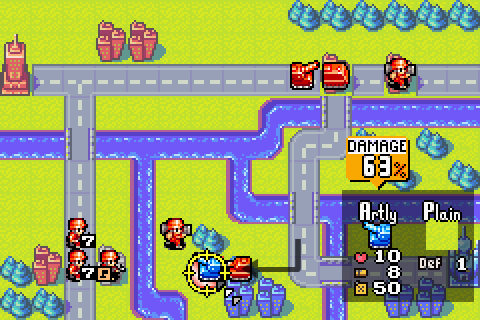
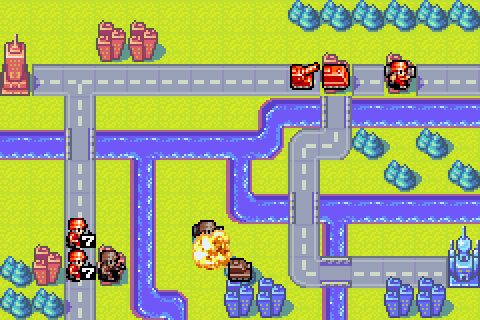
 ) This is why we have artillery units: Indirect Fire! Indirect Fire is the term used for a long-distance attack on the enemy. This technique allows units to Fire without fear of counterfire. Now that that's clear, go ahead and deploy the rest of your troops.
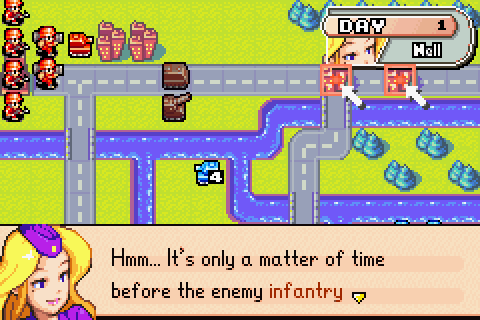 attacks these allied bases. Let's see what we can do to protect them. I think a single tank unit might barely suffice. Please move the unit here.
 be a little tough. The enemy also has tank units nearby, and... I think it would be wise to move a mech unit up as close as possible. Please move this mech unit to this point.
It's going to take that mech a while to get there at this rate. But I assume Nell has a plan.
The remaining units are yours to deploy as you see fit. Would you like some strategic advice?May as well.
There are neutral cities below us, right? It would be serious trouble if they were captured, so let's send these infantry units down there. I think we can Capture the cities and engage the enemy at the same time. But watch out for the enemy artillery. If you don't deploy your troops carefully, the enemy will attack them. Oh, I almost forgot. Wouldn't you like to know how far your units can Fire? Do you remember how we checked an enemy unit's attack range? Check your own troops' attack range the same way. Place the cursor on a unit, then press and hold down the B Button. The area displayed in red indicates the unit's attack range. OK. When you've finished deploying all of your units, select End.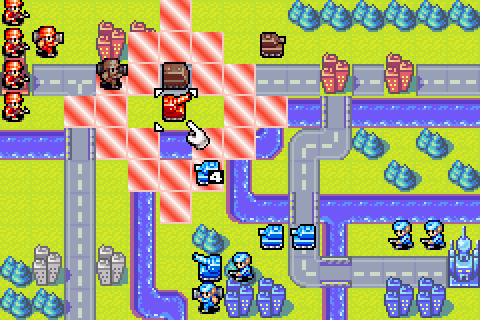
Actually, I forgot to show you guys any attack ranges last turn. Whoops. Here's one, now: you can see that my artillery can hit stuff two or three squares away from it, but not things directly next to it. Same for Olaf's. Different for Grit in that mission we just did, though.
My infantry head on down to those southern cities Nell mentioned.
 Looks like you're bound and determined to get in my way! I'll have my troops swat you like a fly!
Day 2
"It's your turn." Count: 4.
This doesn't look good. Enemy units are closing in, and our mech unit won't arrive in time to help. But don't panic! There's a way for us to help that mech unit move a bit faster and farther. Please select this mech unit. 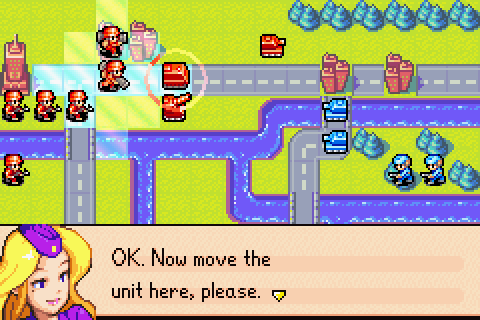
 Please select that command.
Oh well, I guess we're used to the idea of having two units on the same square by now.
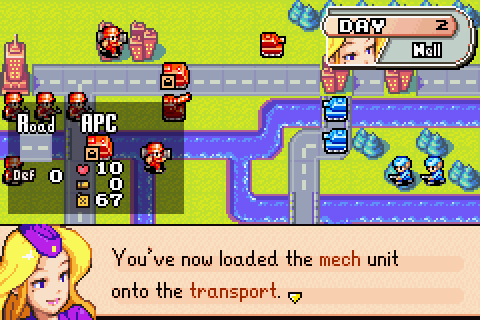 Transport units can carry both mech and infantry units. This effectively increases the movement range for these units. You won't go wrong using transport units to carry troops. Let's move this unit. Would you select it, please?
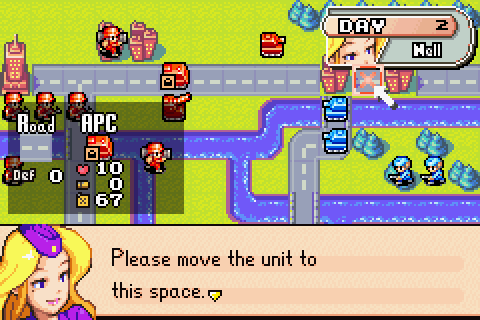
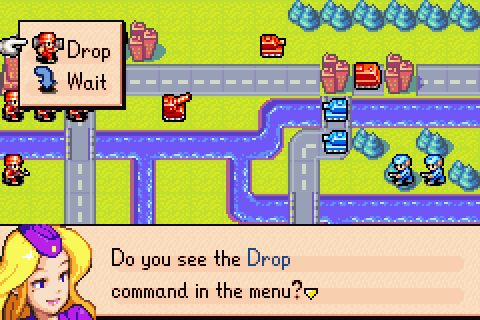 Please select this command. After selecting Drop, you'll need to choose where you want to unload.
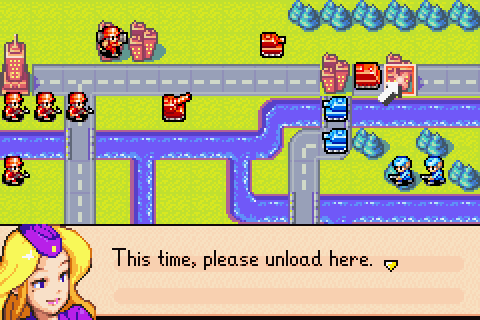 Use the + Control Pad to select the drop point.
Okay, then.
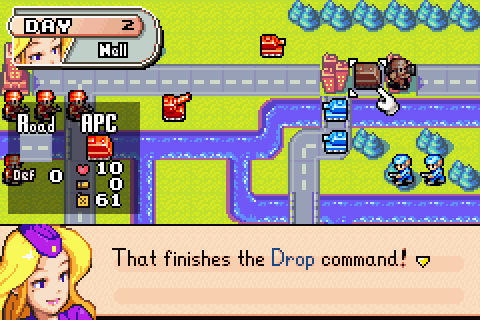 Unloading ends the turn for both the transport and the unloaded unit. This is a much faster way to reach distant objectives, right?
Yeah, seems pretty handy. Could be a logistical nightmare if I'm trying to handle infantry en masse, though. But should help a lot with HQ captures and the like.
So, transport units can Supply all units as well as carry infantry and mech units. But there is one thing you need to remember. Transport units carry no weapons, which means they cannot Fire. For more intel on transport units, place the cursor on one and press the R Button. From this point on, the army is yours to command. Would you like any strategic advice?Two strategic advice sections in one mission? You're on fire today, Nell.
First of all, you need to protect these two cities. You should deploy a tank unit to this city in front of the bridge. Next, I would advise moving this artillery unit near here.Got it.
Oh, and there's one more thing about artillery units I need to tell you. Artillery units are powerful long-range weapons, but they're weak in direct combat. They also can't move and Fire in the same turn. Anyway, once you take care of the enemy tank units, you shouldn't have any problems winning this battle. To win, seize the enemy HQ or wipe out all the enemy troops. It's up to you. Do your best, and good luck!Yeah, that's artillery for you. More powerful than a tank (cheaper, too: 6000G vs. 7000G), but they lack the flexibility that a tank has. Both units are central to AW play though (although they both bow at the altar of infantry, which are the mainstay unit).
Like Nell said, this city by the bridge is an excellent place to park my tank. Only attackable from one direction (by Olaf's tanks, at least), good defensive cover, and heals up 2HP per turn.
Plus I can get an attack in straight away.
And moving the artillery up next to it won't hurt either. Indirect units and "defensive walls"/meatshields are a natural combination, as the indirects can fire straight over the top of the meatshield without worry. Right now we have a pretty classic chokepoint situation here, and Olaf has serious problems.

Finishing up by moving infantry around.

Olaf decides to go on the attack with his damaged tank. You can tell from the look on his face how well that went.
Day 3
You know, Olaf, you could've attacked with your full-health tank. It would have achieved something at least.
Instead the full health tank is just sitting in artillery range. Mmm, juicy.
Artillery: pretty darn effective.
Meanwhile my tank takes down the 1HP tank, and my mech fends off the infantry creeping over the river.
Now then, about Olaf's artillery. Well, he's got that city covered, but the squares around it are fair game.

So let's send some infantry in.
And move up and capture. I had a half-baked scheme to try and pick that mech up with my APC, but it didn't really pan out. No harm done though.
Day 4
Better try and clear these infantry out.
I leave the full-health one alone for a simple reason, though: it's less likely to retreat, and if it does retreat it won't get very far. Last thing we need is to waste time chasing after some crippled tank.

Capturing infantry down.
And Olaf's mech is reduced to 1HP.
My APC heads back east again. Just a bit of indecision on my part, really. Oh well.
Day 5
Olaf retreated his 1HP mech.
Time to take a risk and head off after it.
Since I'm moving into artillery range anyway, might as well go the whole hog and send some other units in. The artillery can only fire at one of them - and if the mech doesn't get hit, then it can deliver some decent damage next turn.
Artillery and mech take care of business in the north, and I send my tank down to make sure I have enough troops to take out the arty.

Owch. I guess that move did cost me. Still surprised that Olaf was able to one-shot me there, though: he must have got lucky.
Day 6
Yeah. First unit loss of Field Training there, I think
 .
.
But at least we can finish it off this turn.
Boom.
 You're doing well. Now get going, and keep up the good work. Grrr... Next time, blast it! Next time!
You know, I think we're starting to get to Olaf.

Hey, got maximum score for speed this time. I did lose a unit, but that wasn't enough to dent my technique (Is this game trying to teach me a lesson about sacrficing lives to make wars end sooner?)
But now, on to my favourite field training mission:
Ready as I'll ever be.
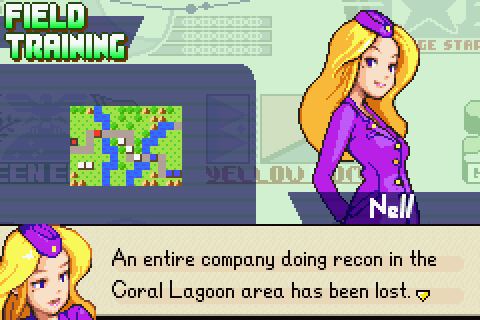 The Coral Fortress is surrounded by mountains, so it's hard to imagine that there are many enemy units there. Still, an entire company is gone, so... The point is, we can't afford to lose that territory. Time to get going!
Hmm... wonder what could have happened to those units?
Day 1
Ohhh, shit.
That explains what happened to the recon units that vanished... Even with your units, I don't know if we can win.I just love the way Nell's building up that medium tank as an unstoppable killing machine. Both because it's kind of funny in hindsight, and genuinely tense if this is your first time playing.
You don't win battles with just a show of force, though. You know that by now, right? I'm going to leave this one up to you. Do you want any strategic hints?Sure. Gotta find a way to deal with that medium tank, after all.
For the time being, you can ignore the medium tanks. Just be sure you don't move into their attack range. Do you remember how to check a unit's attack range? Move the cursor onto the unit and hold the B Button. Now for your strategy...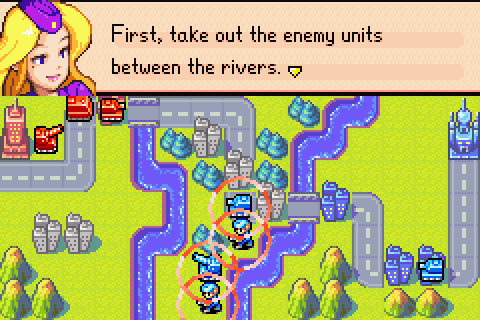 Try to make the most of your tanks, mech units, and artillery. Now, send some infantry to secure the neutral cities below you. The river will protect you from all but the enemy's infantry, so don't worry.
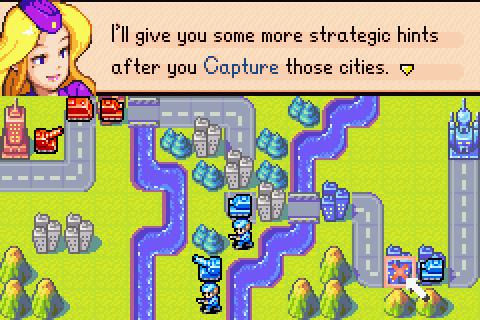 Good luck!
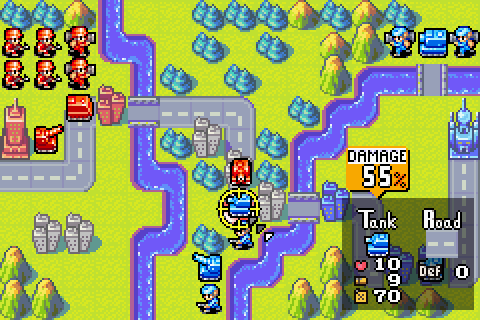
All right, well, better get this ball rolling.
APC loads up with a mech and follows the tank forward, dropping its passenger off on a city.
Infantry move up, keeping their square formation because I dunno, may as well.
... we were just talking about them, Olaf. At least try to get your facts right when you taunt.
You'll soon tremble before the power of the mightiest ground forces ever!I'm pretty sure there are some more powerful units in the pre-Western Nintendo Wars games. There certainly are in later games. But oh well, whatever.
The AI's APC fetish at work again.
Day 2
Olaf, I... Olaf. Artillery do not work that way.
Here, let me show you how it's done.
While that's going on, I retreat my APC to heal up. May as well load a mech into it while I'm back here.
Mech finishes off artillery, tank finishes off tank. I could have attacked from the forest rather than the road with my tank, but I wanted to keep my artillery safe. That arty's going to be vital here.
Finishing up the day by having my infantry move and capture.
Day 3
My tank pays for being left on the road rather than in the forest. But at least the artillery is safe.
Tank retreats, APC advances and drops off its passenger.
Time to give that tank what for!
Two infantry finish capturing, the other two wade into the river.
This time I did leave a gap in my defenses through which Olaf could reach my artillery. But at least he couldn't do much damage this time. He even seems somewhat worried about it.
Day 4

That tank gets finished off by one of my mechs, while the other attacks Olaf's river mech.
Artillery and infantry take down an infantry.
And I get a hit in on Olaf's remaining infantry unit.
Day 5
A fairly quiet turn from Olaf.
I take out his remaining units between the rivers.

And get some capturing done.
Day 6
A fairly quiet day, this one.
I capture a city and bunch my units up around the second bridge, while my artillery retreats to heal.
Day 7
Once more Olaf decides to move his infantry up but not attack.
More meat for the meat grinder.
Okay, there's the medium tank's attack range. We don't want to enter that just yet, although to win we're going to have to. Advance Wars units have different AI settings: units that have been given a defensive mindset won't move unless there's something for them to attack. That medium tank is one such unit.
APC and tank set up at the cities down below. Didn't Nell say something about capturing these?
Moving units up. In particular, getting my fixed-up artillery upfield.
Day 8
Olaf basically just sits there.

Sending more dudes into capture, using my APC to help extend their move range.
Finishing off Olaf's last mech from the river. Didn't want to attack from the city because I want my tank to heal up there.
And there we go.
Day 9
All right, we're capturing these cities now. Let's see what Nell has to say.
 Now, I'll give you some advice for the future. It's not impossible to stop medium tanks with artillery, but it's tough.
Artillery, hmm? Artillery...
Instead, try to stop the medium tanks from crossing the river. Then try to Capture the enemy HQ. If the tanks do get across... Well, like I said, concentrate on the enemy HQ. Capture the HQ or defeat all enemy troops to win! Good luck!
Okay, for now I'm just going to set up just outside the middie's attack range - with one of my mechs using the rivers to get in close. Next turn we move in.
Day 10

All right, let's do this.
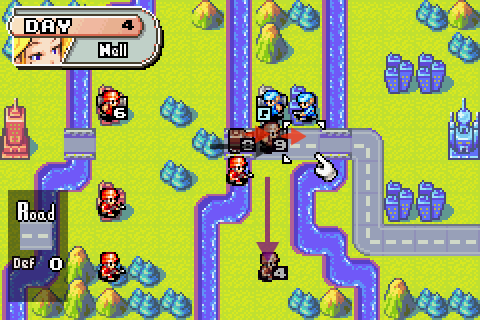
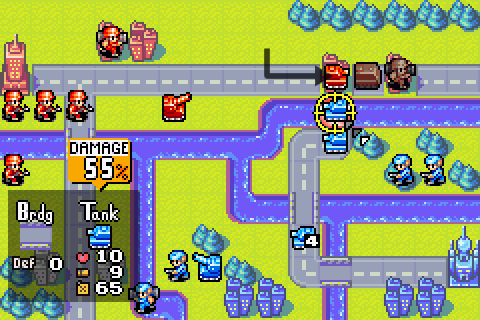
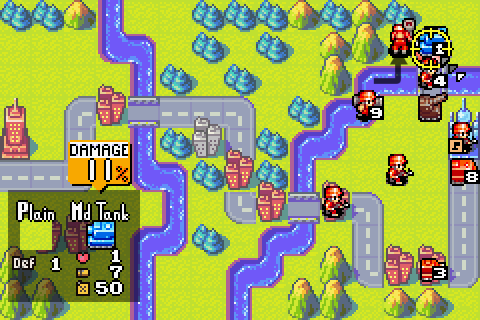
My tank moves onto the bridge - it's got the strongest armour of all my units, and should survive a hit from the middie. Not going to attack just yet though - hahaha no. My artillery moves into position behind it.
Okay, that's the medium tank trapped in place.
I'd better set up to capture the HQ as well just in case this all goes to pot.

Capturing and moving. That 8HP mech is getting ready for a flanking move.
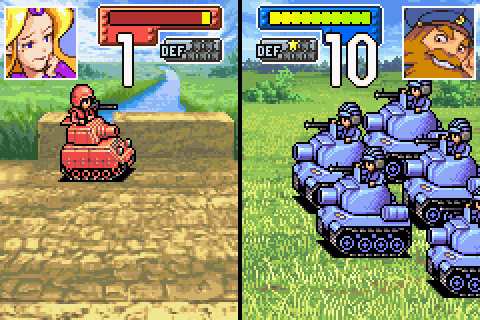
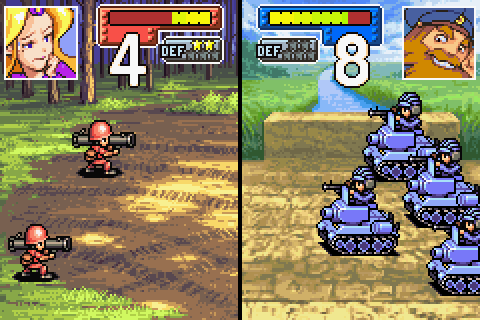
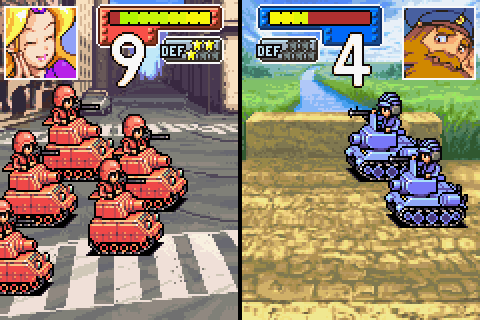
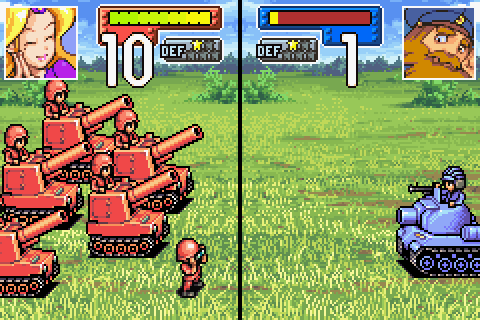
Well then. That tank just took 9HP of damage. Probably somewhat lucky, but it makes the point: medium tanks do not joke around. But at least the tank survived.
Day 11
Okay, so what now?
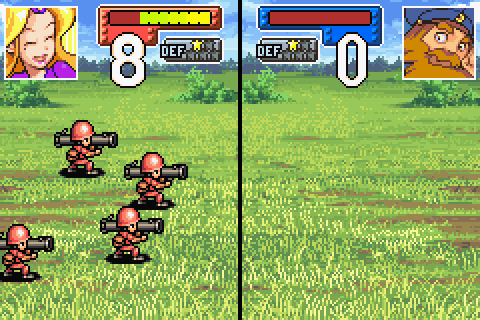
Well, now we counterattack.
4HP of damage isn't a huge amount, but it's a solid hit and anything that can do reasonable damage to these guys is welcomed. Throughout the Advance Wars series, artillery are your go-to solution for a cheap way of dealing with medium tanks and their bigger tanky brethren the Neotank (AW2) and Megatank (AWDS, although arties don't do that much damage to Megatanks). They do solid damage and they don't get counterattacked.
The upshot is a lot of artillery in high-level play and very few medium or heavier tanks. But then, with very few medium tanks that makes artillery less useful, and light tanks become a decent counter to artillery. There's been a fair bit of evolution of the AW metagame over the years.

My crippled tank retreats, and one of my infantry moves up to take its place. At least with the medium tank down to 60% of its attack power, the infantry unit should survive this. I also get capturing that HQ, again, just in case.
Yeah, the infantry survived. Really not sure why Olaf is worried in this screenshot.
Day 12
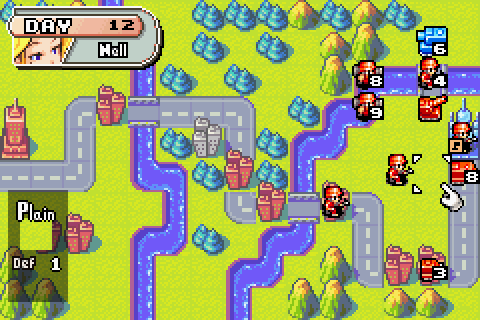
I could just finish this with capturing...
... but I've got a 10-year-old ghost to exorcise. Solid hit from that artillery, taking Olaf down to 1HP.
And my mech looks like it can finish the job.
Catharsis!
Whew. Sadly there isn't any unique dialogue for routing the medium tank. Kind of wish there was, though.
But now that Olaf has Md tanks, our current tactics won't suffice. I'll have to ask central command to send us some, too. Keep up the good work! What?!? Even my medium tanks are defeated??? THAT NELL!!! Hmm... But it doesn't look like she has any medium tanks ready to use... Ha ha ha! I'm sure I'll enjoy our next encounter!Hmm... ominous. But after getting through that, I'm pretty sure we can survive whatever Olaf has to throw at us.

Slow again, but still A-Ranking even though I took quite a bit of a hit on speed. Totally worth it to take out the medium tank, though.
But now it's time to stop pretending that a single medium tank unit is an unstoppable threat to my progress. For now we must encounter...
... this man of mystery.